Topic: DMD0294
Using the Launchpad
Do-more Designer has integrated
the functionality of DirectSOFT Classic's DSLaunch into the programming
software package. The Launchpad manages Do-more Projects, provides links
to helper Applications and manages the communication Links between Do-more Designer and Do-more
controllers. The Launchpad is dockable
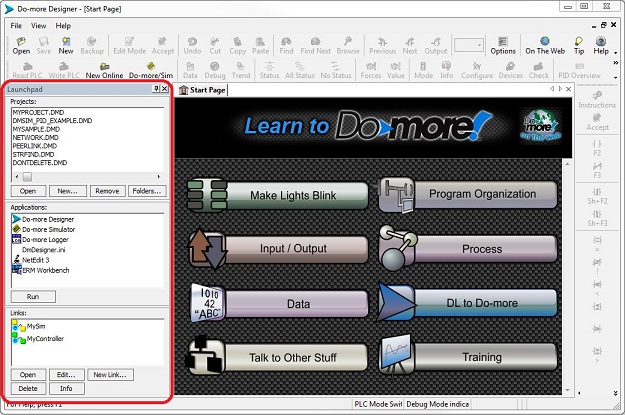
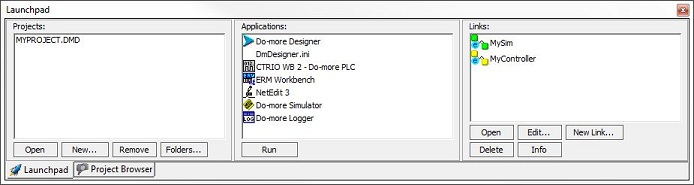
The Launchpad has a vertical orientation (as show above) and a horizontal orientation (as show below). If the Launchpad is docked the orientation will change automatically from vertical to horizontal based on the edge where it is docked (vertical for left/right edge, horizontal for top/bottom edge). If the launchpad is undocked it will change the orientation based on it's height versus it's width.
The Global Tab of the View-> Options Dialog has options to define the layout of the programming environment.
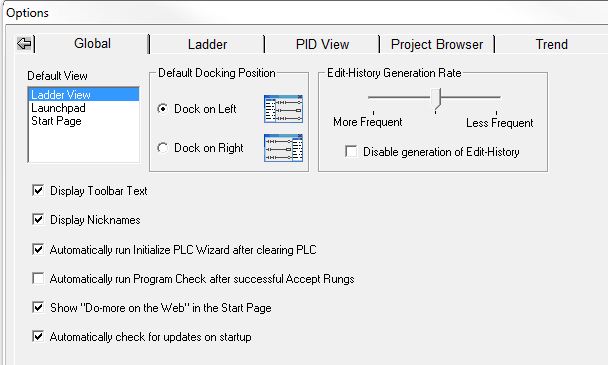
Default View - specifies which View w
Default Docking Position - specifies which edge of the main programming window the Launchpad will dock itself to: Dock on Left or Dock on Right
Edit History Generation Rate - specifies the frequency that edit history points are generated. Refer to the Edit History help topic for more information on setting the generation rate.
Display Toolbar Text - enables and disables whether the text for each toolbar button is displayed or not. Refer to the Customizing the Toolbars help topic for more options.
Display Nicknames - enables and disables the default display of Nicknames for elements that have them. Refer to the Element Documentation help topic for more options.
Automatically run Program Check after successful Accept Rungs - optionally run a Program Check after successfully executing an Accept Rung (F8) operation. Refer to the Program Check help topic for more information.
Show "Do-more on the Web" in the Start Page - enables and disables whether the content from the web site "Do-more on the Web" will be displayed in the top section of the Start Page. Disable the option if the computer running Do-more Designer does not have an Internet connection.
Automatically check for updates on startup - enables and disables the Check for Updates that occurs automatically each time Do-more Designer is started. Refer to the Check for Updates help topic form more information.
 The Projects Section
The Projects group will display entries for all of the Do-more Designer projects that have been opened by this copy of the software. Each time a new project is created, or an existing project is opened an entry displaying the project's name will be added to this group.
 Open
- Open an Existing Project on Disk
Open
- Open an Existing Project on Disk
If a project in the list has been selected, that project will be opened. Note: double-clicking on a project name in the list will also execute the 'Open' operation.
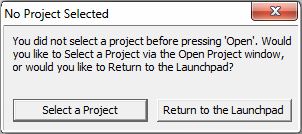
If there are no projects listed, or if none of the currently listed projects is highlighted, this dialog will be displayed.
Select a Project - will open a File Open dialog so the programmer can browse to the location of an existing Do-more Designer project
Return to the Launchpad - will close this dialog and return control to the Launchpad so that an exiting project can be selected.
 New
Offline - Create a New Offline Project
New
Offline - Create a New Offline Project
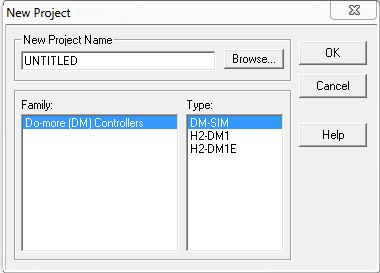
Opens the New Project Dialog which prompts for the following information used to create a new project:
New Project Name - enter the name for the new project, or browse to an existing project that will be overwritten. Note: if an existing project name is selected you will be asked to confirm this operation that will overwrite all of the information in the existing project.
Family - specifies the controller family, in this case Do-more (DM) Controllers is the only choice
Type - specifies which of the Do-more controllers will be the target device for the new project, Select the desired controller part number.
Click the OK button to create the new offline project, and open that project in the programming software.
Click the Cancel button to exit the dialog and NOT create a new offline project.
Click the Help button to invoke the Help topic.
 Remove - Delete an Existing Project
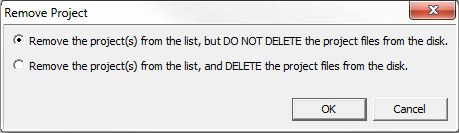
Removes the currently selected project or projects from the Projects list and optionally deletes the project files from disk. Note: use Ctrl-Click with the mouse to select multiple projects.
Remove the project(s) from the list, but DO NOT DELETE the project files from the disk - select this option to remove the project from the Projects list but the files associated with the project will NOT be deleted.
Remove the project(s) from the list, and DELETE the project files from the disk - select this option to remove the project from the Projects and delete the files associated with the project.
 Folders... - Change
Project Folder Locations
Folders... - Change
Project Folder Locations
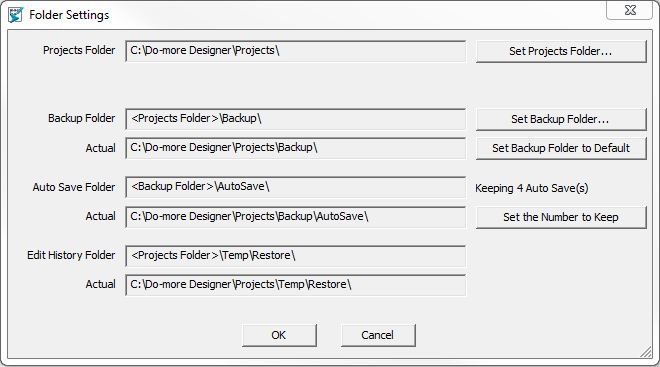
Opens the Folder Settings dialog that displays the current locations for storing Do-more Designer project files.
After opening a project this dialog can be invoked by selecting the File-> Manage Project-> Folders Settings menu item.
The default location is the Projects sub-folder where Do-more Designer is installed. A folder is created in the Projects folder for each project that is saved to Disk.
Click the Set Projects Folder button to invoke a dialog that allows the user to select an existing folder, or to create a new folder. It is recommended that the Project Folder be located on the same computer where Do-more Designer is installed. Regardless of the location, the programmer must have write-access to the selected folder.
The project folder for each project will also contain three sub-folders that are used as follows:
Projects Folder
- this is the folder that will contain all of the files for each Do-more Designer project.
Click the Set Projects Folder... button to invoke a dialog that allows
the user to select an existing folder, or to create a new folder to begin
storing the Do-more Designer
projects. This folder can exist on the hard drive where Do-more Designer is installed, or removable disk,
or on a network-accessible disk location. Regardless of the location,
the programmer must have write-access to the selected folder.
Backup Folder
- designates a location to store backup copies of the projects that are
created through the File -> Backup Project operation. The default location
is the \Backup folder where the Do-more
Designer Projects are stored.
Click the Set Backup Folder button
to invoke a dialog that allows the user to select an existing folder,
or to create a new folder to begin storing the backup copies of the projects.
This folder can exist on the hard drive where Do-more
Designer is installed, or removable disk, or on a network-accessible disk
location. Regardless of the location, the programmer must have write-access
to the selected folder.
Click the Set Backup Folder to Default
button to reset the backup folder to it's default location of <Projects
Folder>\Backup
Auto-Save
Folder - designates a location to store copies of the projects
created by the Auto-Save process.
Restore
Point Folder - designates a location to store copies of the project
created by the Restore Point process.
Keeping
4 Auto Save(s) - displays the number of Auto Saves that Do-more
Designer will keep on disk.
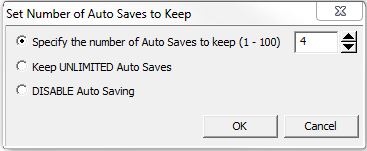 Click the Set
Number to Keep button to display a dialog with the following options:
Click the Set
Number to Keep button to display a dialog with the following options:
Specify the number of Auto Saves to Keep (1 - 100) - enter the number to keep
Keep UNLIMITED Auto Saves - Auto Saves will not be deleted by Do-more Designer
DISABLE Auto Saving - the Auto Save process is disabled, no Auto Saves will be created
A complete discussion on the Auto Save process is available in the section on Project Backup and Restore.
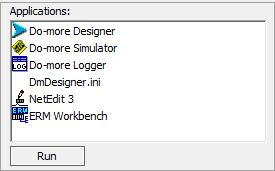 The Applications Section
The Applications group contains links to applications and utilities that are used in conjunction with Do-more Designer. There are also links to web sites that contain additional useful information that make using the programing software easier.
Run - executes the item that is highlighted. Note: double-clicking on an application name in the list will also execute the 'Run' operation.
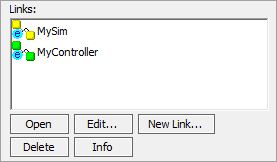 The Links Section
The Links group contains icons
representing communication links to Do-more controllers that have been
created by this copy of the software. There are different link icons for
each communication port type that can be used by Do-more
Designer:
Ethernet - links that utilize an Ethernet port will have a lowercase 'e' in the icon
Serial - links that utilize a serial port will have a lowercase 's' in the icon
USB - links that utilize a USB port will have a lowercase 'u' in the icon
Modem - links that utilize a modem will have a lowercase 'm' in the icon
When Do-more Designer starts
up, it steps through each of the links in the list and checks to see if
the controller that is defined in the link is currently accessible. The
link icon uses color to convey the current connection status of a link
icon as follows:
Green - the controller is currently accessible using the parameters currently defined in that link
Yellow - the controller is NOT currently accessible using the parameters currently defined in that link, this could be because the communication cable is unplugged, or the controller is turned OFF, or that the communication parameters in the link no longer match the port setup on the controller.
Open - attempts to go online with the controller using the port parameters as defined in the currently highlighted link. Note: double-clicking on a link icon in the list will also execute the 'Open' operation.
Edit... - invokes the Configure Link dialog for the currently highlighted Link so that the communication parameters of the link can be modified
New Link... - invokes the Link Wizard which will guide the programmer step-by-step through the process of creating a new communication link to a controller
Delete - deletes the currently highlighted Link. Note: a link that is currently in use by a programming session cannot be deleted.
Info - invokes the Link Info dialog for the currently highlighted Link so that the current status of the communication link can be viewed.
For a complete description of creating, editing, deleting and using communications links, go to the Overview of Communication Links help topic.